This wizard step will help you to put a downloaded Super Grub2 Disk ISO into an usb pendrive. This method advantage is that pendrive contents will not erased at any time as it happens with other methods.
Depending on which Operating System you want to use there are two sets of instructions for achieving this task. Please choose one of them.
Put Super Grub2 Disk into an usb pendrive as an ISO image from Windows
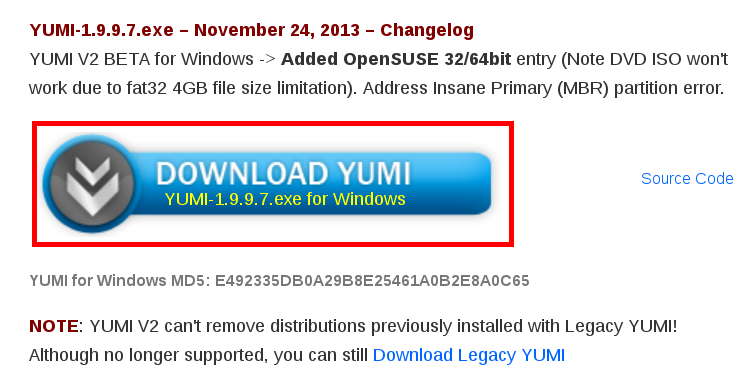
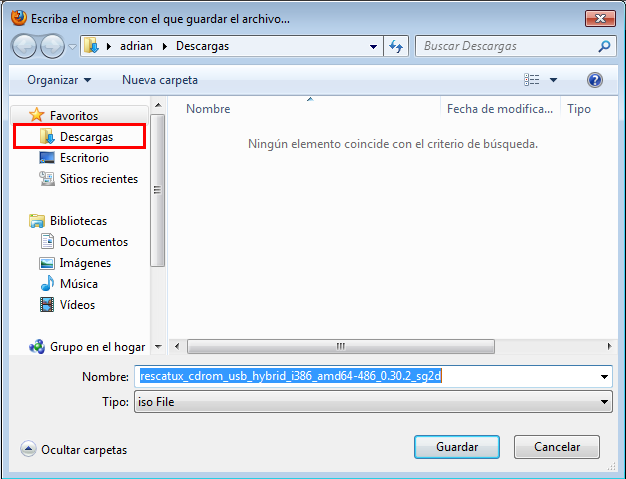
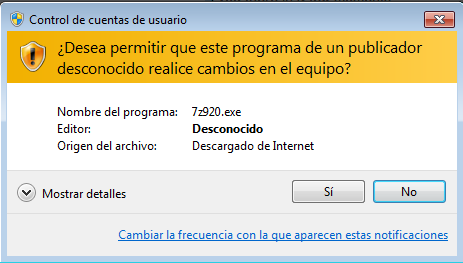
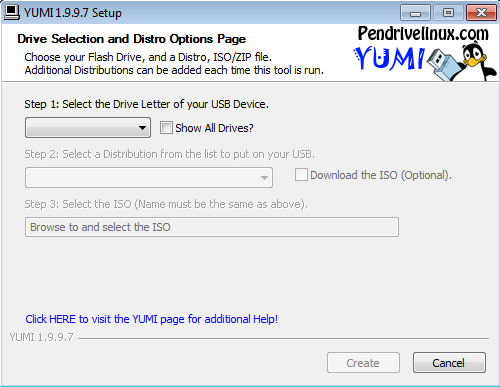
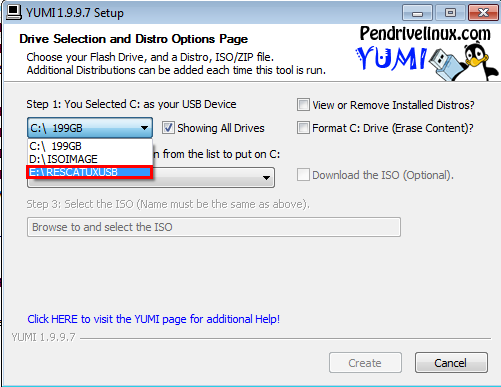
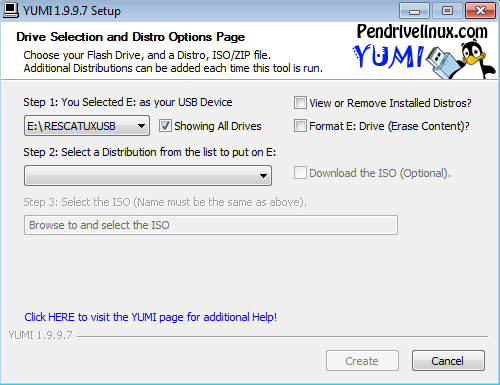
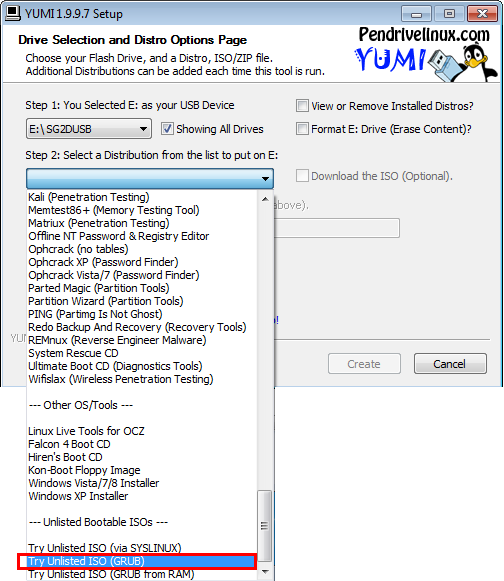
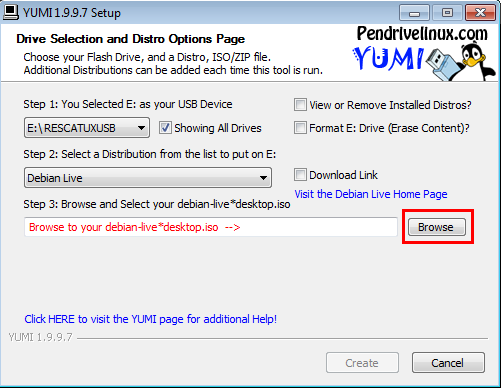
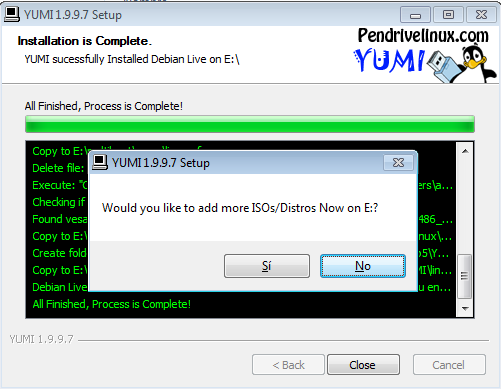
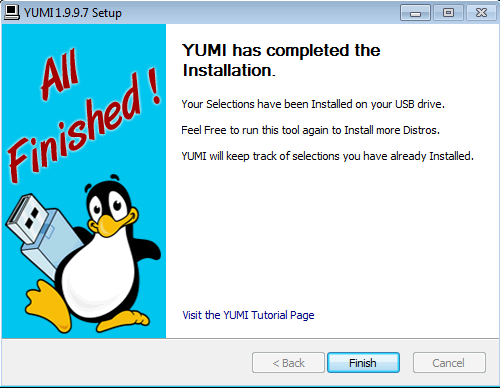
This wizard step will help you to put a downloaded Super Grub2 Disk ISO into an usb pendrive. This wizard is specifically designed for people that use Windows Operating System. This method advantage is that pendrive contents will not erased at any time as it happens with other methods. Open your Internet Browser and point it to: www.pendrivelinux.com And click on: YUMI – Your Universal Multiboot Installer Click on the big blue download link (When this document was written it was named: DOWNLOAD YUMI YUMI-1.9.9.5B.exe for Windows). Once you see the Save Link As dialog instead of just accepting the default location for Download please make sure you know where you’re downloading it. Or alternatively choose a folder in your computer that you know how to access. Probably you might want to select Documents, My Documents, Desktop or other familiar locations. Please write down this location on your computer because we will need it later in order to run YUMI. TIP: Use this direct link to get to YUMI download page. This wizard step will help you to run YUMI. YUMI is a tool that will help you to put a Rescatux ISO into a pendrive very easily. Either by clicking on My PC, PC or Explorer (The yellow thing with some folders on it) you should open a window that lets you navigate through all your files in your computer. Make sure you navigate to the folder where you downloaded YUMI. Double click on YUMI file. A dialog will appear asking if you wish that an unknown publisher program makes changes in your computer. Select Yes or OK answer. Please read the License Agreement carefully and when you are ok with it please click on I agree button. Once you see an screen named: Drive Selection and Distro Options Page you have finished this step. The USB Device must be FAT32 formatted. That doesn’t mean that it needs to be blank. It means that its format has to be FAT32. The USB Device should not loss any data but, as always, you are advised to backup your USB Device. In the YUMI Step 1 dropdown make sure to select the Drive Letter that identifies the USB drive where you want Super Grub2 Disk to be put in. If needed click on Showing All Drives but then be more careful than before. You might screw the current system you are using if you choose the wrong drive. TIP: Either by clicking on My PC, PC or Explorer (The yellow thing with some folders on it) you should open a window that lets you navigate through all your files in your computer. Try to navigate to all the Drive letters that you see in YUMI so that you know which it’s the one that corresponds to your USB drive. In the YUMI Step 2 dropdown please select Try Unlisted ISO (GRUB) inside — Unlisted bootable ISOs —. In the YUMI Step 3 you need to click in Browse button to select Super Grub2 Disk ISO. Navigate to the folder where you know the Super Grub2 Disk ISO is. Select Super Grub2 Disk ISO file and click Open (E.g. super_grub_disk_hybrid-1.98s1.iso) Then click on Open button. Back on main YUMI screen click on Create button. If it’s the first time you are using Yumi you will be asked to confirm what it’s going to do. Say Yes. A dialog progress will appear that shows how USB is being prepared. Finally you see All Finish, Process is Complete! Click on Next > button. When you are asked: Would you like to add more ISOs/Distrows Now on X:? Click on No button. Finally click on Finish button. When the YUMI program is closed then you have finished this step.Put Super Grub2 Disk into an usb pendrive as an ISO image from Windows
Download YUMI
Visit pendrivelinux site
YUMI specific page
Download YUMI
Run YUMI in Windows
Find YUMI
Run YUMI
Plug your USB Device into your computer

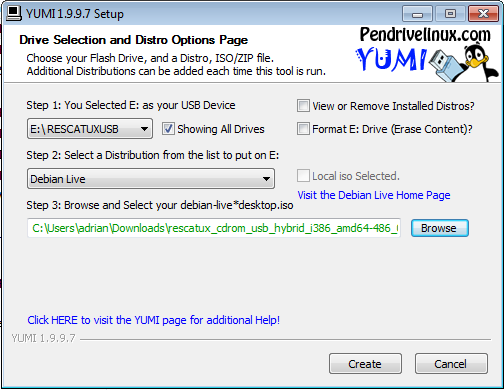
Select Drive letter of your USB Device
Select Try unlisted ISO (Grub) as Distribution
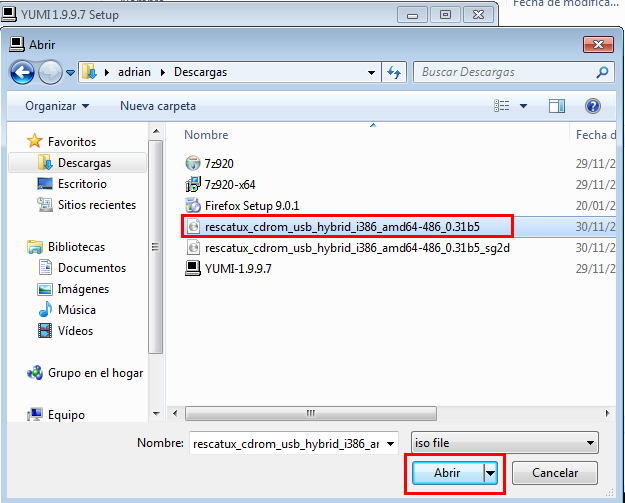
Browse and select Super Grub2 Disk ISO
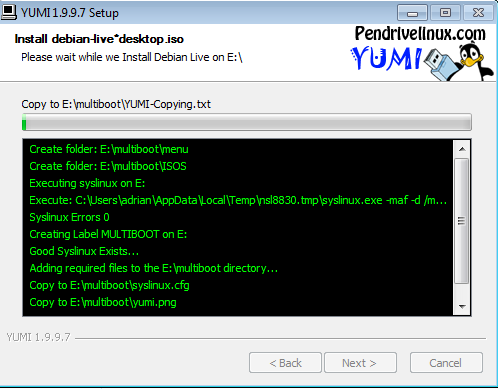
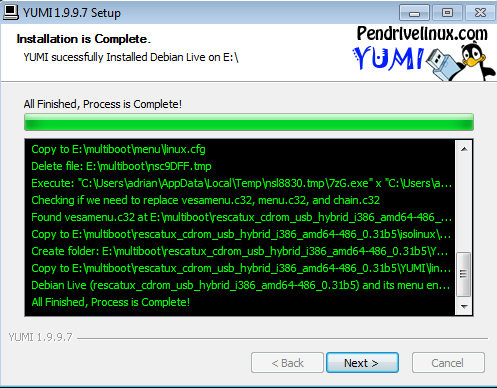
Create the Super Grub2 Disk USB

Put Super Grub2 Disk into an usb pendrive as an ISO image from Gnu/Linux
No info how to Super Grub2 Disk into an usb pendrive as an ISO image from Gnu/Linux yet. Sorry.
very good
supergrub
I installed Super Grub Disk2 onto a thumb drive and set the bios to see it as the primary boot device.
Happy to say this works great. Allows me to dual boot into either Windows 7 or Windows 10 just fine. Quite pleased since some of my most critical software will now work on Win 10.
1 problem and on thought. I cannot use the dual boot if I tell the computer to RESTART. Using RESTART from either operating systems will fail to recognize the keyboard. Must go to SHUTDOWN the restart the machine. Just a learning curve, not a real problem.
Thought: The program has many more options that I need. Can it be configured to open directly on “Manual Boot” and then go directly to the “operating systems” selection. This would keep me from going through all the menu selections just to boot the machine.
The main usage of the disk is to be able to boot into your machine when something it’s wrong.
Then you are supposed to fix it permanently from your installed OS.
In other words you are not supposed to use the disk in a daily basis.