This wizard step will help you to put a downloaded Rescatux ISO into an usb pendrive.
There are three supported ways of putting Rescatux into an usb pendrive. Now you should choose one of them.
Put Rescatux into an usb as a Isolinux image
This is the recommended method for those who have free space in their usb pendrive for Rescatux ISO contents but they don’t want to wipe or loose the pendrive contents (as it happens with other methods).
The only disavantage is that Super Grub2 Disk is not integrated into Rescatux as the original Rescatux image is.
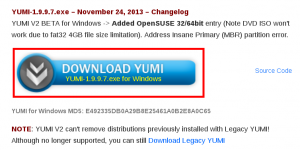
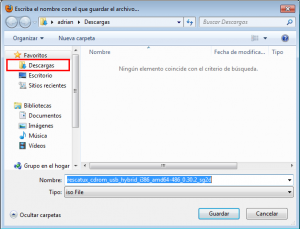
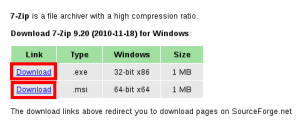
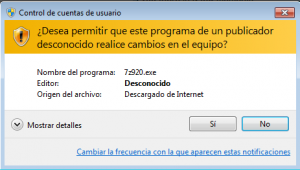
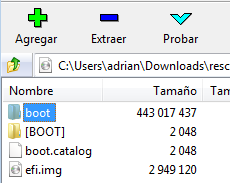
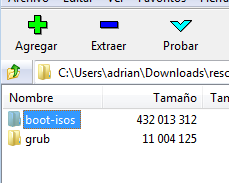
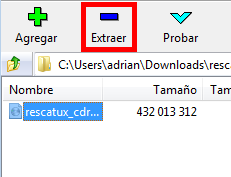
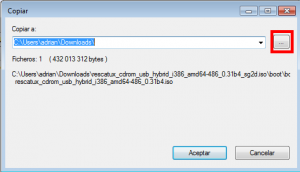
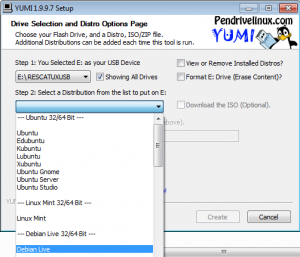
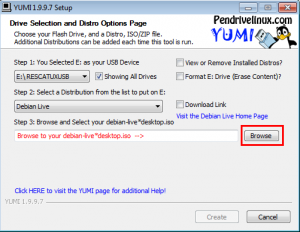
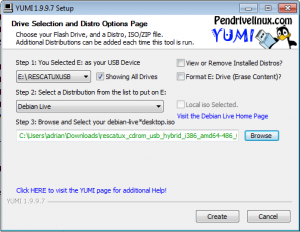
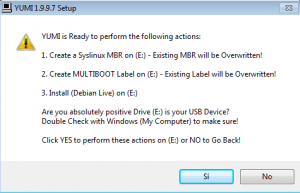
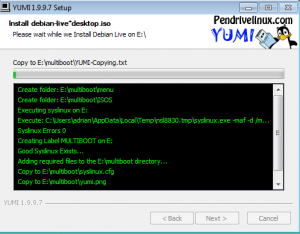
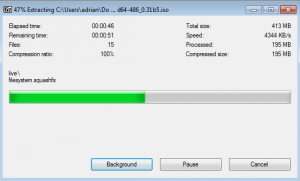
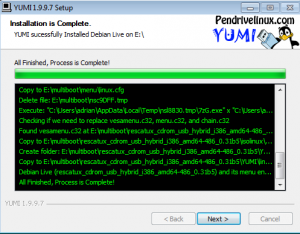
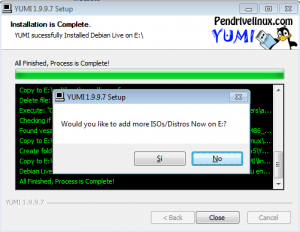
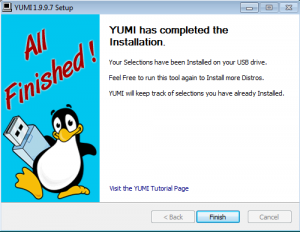
This wizard step will help you to put a downloaded Rescatux ISO into an usb pendrive. This method advantage is that pendrive contents will not erased at any time as it happens with other methods. Depending on which Operating System you want to use there are two sets of instructions for achieving this task. Please choose one of them. This wizard step will help you to put a downloaded Rescatux ISO into an usb pendrive. This wizard is specifically designed for people that use Windows Operating System. This method advantage is that pendrive contents will not erased at any time as it happens with other methods. Open your Internet Browser and point it to: www.pendrivelinux.com And click on: YUMI – Your Universal Multiboot Installer Click on the big blue download link (When this document was written it was named: DOWNLOAD YUMI YUMI-1.9.9.5B.exe for Windows). Once you see the Save Link As dialog instead of just accepting the default location for Download please make sure you know where you’re downloading it. Or alternatively choose a folder in your computer that you know how to access. Probably you might want to select Documents, My Documents, Desktop or other familiar locations. Please write down this location on your computer because we will need it later in order to run YUMI. TIP: Use this direct link to get to YUMI download page. This wizard step will help you to download 7-zip. 7-zip is a tool that will help you to unzip Isolinux based Rescatux from Super Grub2 Disk based Rescatux (the latter one is the original Rescatux). Additional 7-zip is open source and can be used instead of other propietary tools like WinRAR, WinACE or WinZIP for compression, packing and unpacking tasks. Open your Internet Browser and point it to: www.7-zip.org Click on one of the central Download links. If you’re using a 64bit Windows you should select the .msi type one. If your Windows is 32bit select the .exe one. Try first with the 64bit one and if it doesn’t work then try the 32bit one. Once you see the Save Link As dialog instead of just accepting the default location for Download please make sure you know where you’re downloading it. Or alternatively choose a folder in your computer that you know how to access. Probably you might want to select Documents, My Documents, Desktop or other familiar locations. Please write down this location on your computer because we will need it later in order to run 7-zip installer. TIP: Use this direct link to get to 7-zip page. This wizard step will help you to install 7-zip. 7-zip is a tool that will help you to unzip Isolinux based Rescatux from Super Grub2 Disk based Rescatux (the latter one is the original Rescatux). Additional 7-zip is open source and can be used instead of other propietary tools like WinRAR, WinACE or WinZIP for compression, packing and unpacking tasks. Either by clicking on My PC, PC or Explorer (The yellow thing with some folders on it) you should open a window that lets you navigate through all your files in your computer. Make sure you navigate to the folder where you downloaded 7-zip. Double click on 7-zip installer. Should a dialog appear asking if you wish that an unknown publisher program makes changes in your computer then select Yes or OK answer. A dialog will appear asking your for a Destination Folder. Just use the default Destination Folder and click Install button. You will be informed that 7-Zip has been installed on your computer. Please click Finish button. Once the 7-zip installer window closes then you have finished this step. This wizard step will help you to extract Rescatux Isolinux ISO out of Super Grub2 Disk based Rescatux (the latter one is the original Rescatux). Either by clicking on My PC, PC or Explorer (The yellow thing with some folders on it) you should open a window that lets you navigate through all your files in your computer. Make sure you navigate to the folder where you downloaded Rescatux ISO. Right click on Rescatux ISO file. You should move your mouse over 7-zip and then over Open archive and finally click on it. 7-zip will appear in your screen. Double click on boot (not on [BOOT]). Double click again on boot-isos. Now you should see Isolinux based Rescatux selected. Click in less sign button named Extract. Click on … Button so that you know exactly where you extract the file. Finally click on Yes or OK answer. A dialog should appear showing you the extraction progress. When the extraction dialog closes at uncompression end then you have finished this step. This wizard step will help you to run YUMI. YUMI is a tool that will help you to put a Rescatux ISO into a pendrive very easily. Either by clicking on My PC, PC or Explorer (The yellow thing with some folders on it) you should open a window that lets you navigate through all your files in your computer. Make sure you navigate to the folder where you downloaded YUMI. Double click on YUMI file. A dialog will appear asking if you wish that an unknown publisher program makes changes in your computer. Select Yes or OK answer. Please read the License Agreement carefully and when you are ok with it please click on I agree button. Once you see an screen named: Drive Selection and Distro Options Page you have finished this step. The USB Device must be either FAT32 formatted or NTFS formatted. That doesn’t mean that it needs to be blank. It means that its format has to be FAT32 or NTFS. The USB Device should not loss any data but, as always, you are advised to backup your USB Device. In the YUMI Step 1 dropdown make sure to select the Drive Letter that identifies the USB drive where you want Rescatux to be put in. If needed click on Showing All Drives but then be more careful than before. You might screw the current system you are using if you choose the wrong drive. TIP: Either by clicking on My PC, PC or Explorer (The yellow thing with some folders on it) you should open a window that lets you navigate through all your files in your computer. Try to navigate to all the Drive letters that you see in YUMI so that you know which it’s the one that corresponds to your USB drive. In the YUMI Step 2 dropdown please select Debian Live inside — Debian Live 32/64 Bit —. In the YUMI Step 3 you need to click in Browse button to select Isolinux based Rescatux ISO. Navigate to the folder where you know the Isolinux based Rescatux ISO is. Don’t be afraid about not seeing it. Now in the Name box please write: *.* and click Open. Now you can select the Isolinux based Rescatux ISO. If you happen to have Isolinux based Rescatux and Super Grub2 Disk based Rescatux side to side you will recognise the latter because it ends with _sg2d. Just choose the other one, the one that ends with Rescatux version. (E.g. rescatux_cdrom_usb_hybrid_i386_amd64-486_0.30.2) Then click on Open button. Back on main YUMI screen click on Create button. If it’s the first time you are using Yumi you will be asked to confirm what it’s going to do. Say Yes. A dialog progress will appear that shows how USB is being prepared. Then a dialog progress will appear that shows how ISO file contents are being unpacked. Finally you see All Finish, Process is Complete! Click on Next > button. When you are asked: Would you like to add more ISOs/Distrows Now on X:? Click on No button. Finally click on Finish button. When the YUMI program is closed then you have finished this step. Sorry no info on how to Put Rescatux into an usb pendrive as an Isolinux from Gnu/Linux yet. Sorry.Put Rescatux into an usb as an Isolinux image
Put Rescatux into an usb pendrive as an Isolinux from Windows
Download YUMI
Visit pendrivelinux site
YUMI specific page
Download YUMI
Download 7-zip
Visit 7-zip site
Download 7-zip

Install 7-zip in Windows
Find 7-zip
Install 7-zip
Extract Rescatux ISO in Windows thanks to 7-zip
Find Rescatux ISO
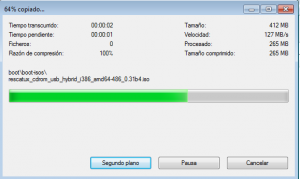
Extract ISO contents

Run YUMI in Windows
Find YUMI
Run YUMI

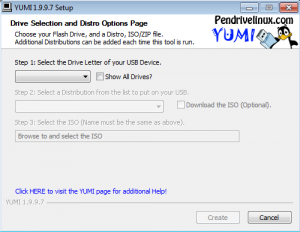
Plug your USB Device into your computer

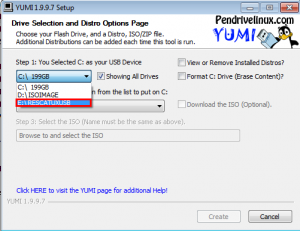
Select Drive letter of your USB Device
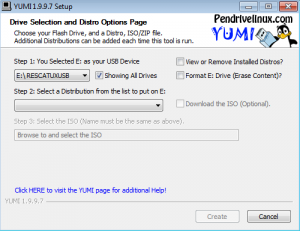
Select Debian Live as Distribution
Browse and select Isolinux Rescatux ISO
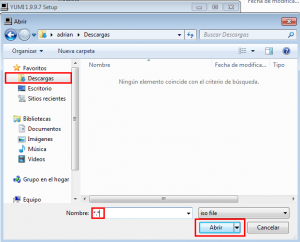
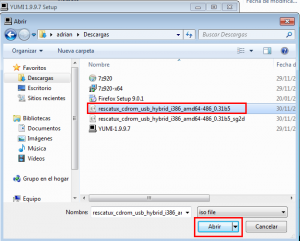
Create the Rescatux USB
Put Rescatux into an usb pendrive as an Isolinux from from Gnu/Linux
Put Rescatux raw image into an usb
This is the method that it should always work. Unfortunately it wipes all the pendrive contents. It’s only recommended if your pendrive is about 1 GB size and you don’t mind having about unused 600 MB space in it.
No info on how to put Rescatux raw image into an usb yet. Sorry.
Put Rescatux raw image into an usb and use it as an storage too
This is the method that it should always work. Unfortunately it initially wipes all the pendrive contents. After an additional steps the pendrive can be reused to store any data and Rescatux is also there ready to be used.
No info on how to put Rescatux raw image into an usb and use it as an storage too. Sorry.
lol no info to install or make the key , thanks ::!!
Have you tried to click on: Put Rescatux into an usb as a Isolinux image ?
Aren’t you seeing it in another colour so that invites you to click on it?
What design change would have it make more obvious to you?
Thank you.
This is so stupid. No description at all. What design?
Think with your head!
What description are you expecting exactly?
What’s wrong with design specifically?
Thank you for your feedback.
Rescatux raw image into a usb (on linux):
Find which device is your USB by running as root (check out for the size):
fdisk -l
Run dd command to write iso on the USB device as root (make sure you choose the right usb device and not one of your hard drives):
dd if=the_file.iso of=usb_devive
example:
dd if=rescatux_cdrom_usb_hybrid_i386_amd64-486_0.30.2_sg2d.iso of=/dev/sdb
(check that I am using the whole device and not a partition (sdb1) on the example this is right)
WARNING:
dd will delete all for your files on the usb device, so take backup if you need the content of this usb.
NOTICE:
The usb device may be not mountable after this but you should boot without problem.
PS Thanks people of rescatux helping me with my grub problem
Thank you Border.
Your instructions seem to be accurate. I’ll probably use them as a template when composing the final documentation.
Superconfusing guide but the info is all in there.
I imagine that it is very unclear to some ppl if what is outlined here is one or several different optional procedures 🙂
Yes, hopefully Rescatux 0.32 will be based only on Isolinux and not Super Grub2 Disk, that would mean skipping one step.
Not sure how but I’ll try to make more clear the different procedures and complete them also.
Thanks for the info adrian15 and Border! Actually I found the guide pretty clear and helpful. I only had trouble in one step. Thanks again =) Worked like a charm!
i couldn’t get it to work
Please join the mailing list and tell us much more details, e.g., exactly which step is not working as expected.
“Now info on how to put Rescatux raw image into an usb and use it as an storage too. Sorry.”
“Now” or “No”?
After such a long time no progress or correcting typos… Hmmm…
Woudl be better to delete the last part from it because its confusing and even no existent…
I meant ‘No info’. Fixed. Thank you.
It’s me again because i think i shall tell your my way for booting several Live ISOS.
You can put your Android device to an Rescue or Live device with this app:
https://play.google.com/store/apps/details?id=com.softwarebakery.drivedroid
I use it since many month repairing and / or installing Distros with the easy of an tap.
If your Droid is rooted like mine this app will be your friend.
This is actually informative, thank you!
People who complain just need to re-read it again.
Boot-isos is not a sub-folder that appears when I use 7 zip and go into the boot folder (not [BOOT]). I cannot get past this step annoyingly.
If you really want to use this guide then use the iso as-is, without trying to find an iso inside the iso.
Alternatively you can use the straight-foward tool named: Balena Etcher to put the iso into the usb device (it wipes the usb device).