This wizard step will help you to put a downloaded Super Grub2 Disk ISO into a media, that means either an usb pendrive or a cdrom.
Now you need to decide either if you are going to use an usb pendrive or if you are going to use a cdrom (or dvd) media for storing Super Grub2 Disk.
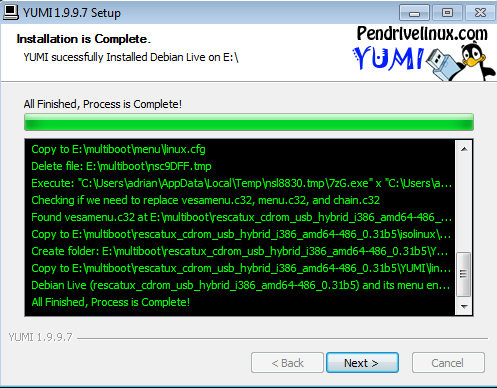
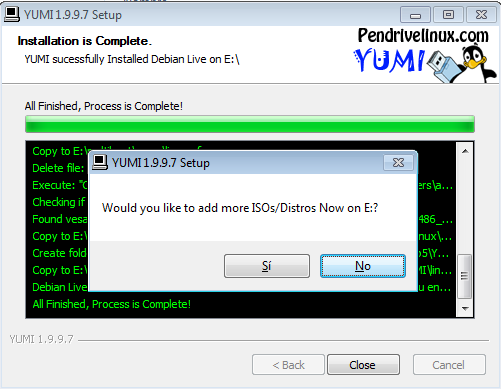
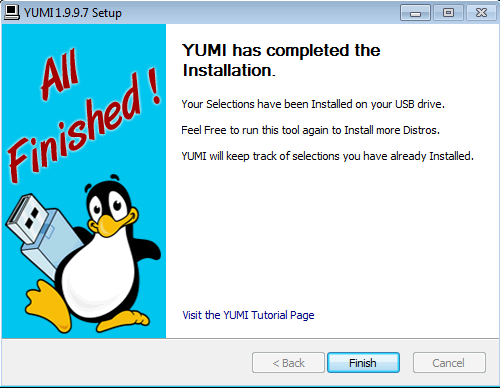
This wizard step will help you to put a downloaded Super Grub2 Disk ISO into an usb pendrive. There are three supported ways of putting Super Grub2 Disk into an usb pendrive. Now you should choose one of them. This is the recommended method for those who have free space in their usb pendrive for Super Grub2 Disk ISO contents but they don’t want to wipe or loose the pendrive contents (as it happens with other methods). The only disavantage might be that in very rare systems it might not boot because it probably uses a BIOS interruption that might not be available in every system. This wizard step will help you to put a downloaded Super Grub2 Disk ISO into an usb pendrive. This method advantage is that pendrive contents will not erased at any time as it happens with other methods. Depending on which Operating System you want to use there are two sets of instructions for achieving this task. Please choose one of them. This wizard step will help you to put a downloaded Super Grub2 Disk ISO into an usb pendrive. This wizard is specifically designed for people that use Windows Operating System. This method advantage is that pendrive contents will not erased at any time as it happens with other methods. Open your Internet Browser and point it to: www.pendrivelinux.com And click on: YUMI – Your Universal Multiboot Installer Click on the big blue download link (When this document was written it was named: DOWNLOAD YUMI YUMI-1.9.9.5B.exe for Windows). Once you see the Save Link As dialog instead of just accepting the default location for Download please make sure you know where you’re downloading it. Or alternatively choose a folder in your computer that you know how to access. Probably you might want to select Documents, My Documents, Desktop or other familiar locations. Please write down this location on your computer because we will need it later in order to run YUMI. TIP: Use this direct link to get to YUMI download page. This wizard step will help you to run YUMI. YUMI is a tool that will help you to put a Rescatux ISO into a pendrive very easily. Either by clicking on My PC, PC or Explorer (The yellow thing with some folders on it) you should open a window that lets you navigate through all your files in your computer. Make sure you navigate to the folder where you downloaded YUMI. Double click on YUMI file. A dialog will appear asking if you wish that an unknown publisher program makes changes in your computer. Select Yes or OK answer. Please read the License Agreement carefully and when you are ok with it please click on I agree button. Once you see an screen named: Drive Selection and Distro Options Page you have finished this step. The USB Device must be FAT32 formatted. That doesn’t mean that it needs to be blank. It means that its format has to be FAT32. The USB Device should not loss any data but, as always, you are advised to backup your USB Device. In the YUMI Step 1 dropdown make sure to select the Drive Letter that identifies the USB drive where you want Super Grub2 Disk to be put in. If needed click on Showing All Drives but then be more careful than before. You might screw the current system you are using if you choose the wrong drive. TIP: Either by clicking on My PC, PC or Explorer (The yellow thing with some folders on it) you should open a window that lets you navigate through all your files in your computer. Try to navigate to all the Drive letters that you see in YUMI so that you know which it’s the one that corresponds to your USB drive. In the YUMI Step 2 dropdown please select Try Unlisted ISO (GRUB) inside — Unlisted bootable ISOs —. In the YUMI Step 3 you need to click in Browse button to select Super Grub2 Disk ISO. Navigate to the folder where you know the Super Grub2 Disk ISO is. Select Super Grub2 Disk ISO file and click Open (E.g. super_grub_disk_hybrid-1.98s1.iso) Then click on Open button. Back on main YUMI screen click on Create button. If it’s the first time you are using Yumi you will be asked to confirm what it’s going to do. Say Yes. A dialog progress will appear that shows how USB is being prepared. Finally you see All Finish, Process is Complete! Click on Next > button. When you are asked: Would you like to add more ISOs/Distrows Now on X:? Click on No button. Finally click on Finish button. When the YUMI program is closed then you have finished this step. No info how to Super Grub2 Disk into an usb pendrive as an ISO image from Gnu/Linux yet. Sorry. This is the method that it should always work. Unfortunately it wipes all the pendrive contents. It’s only recommended if you don’t mind having unused space in your pendrive. No info on how to put Super Grub2 Disk raw image into an usb yet. Sorry. This is the method that it should always work. Unfortunately it initially wipes all the pendrive contents. After an additional steps the pendrive can be reused to store any data and Super Grub2 Disk is also there ready to be used. No info on ow to put Super Grub2 Disk raw image into an usb and use it as an storage too yet. Sorry.Wizard Step – Put Super Grub2 Disk into an usb pendrive
Put Super Grub2 Disk into an usb as an ISO image
Put Super Grub2 Disk into an usb as an ISO image
Put Super Grub2 Disk into an usb pendrive as an ISO image from Windows
Put Super Grub2 Disk into an usb pendrive as an ISO image from Windows
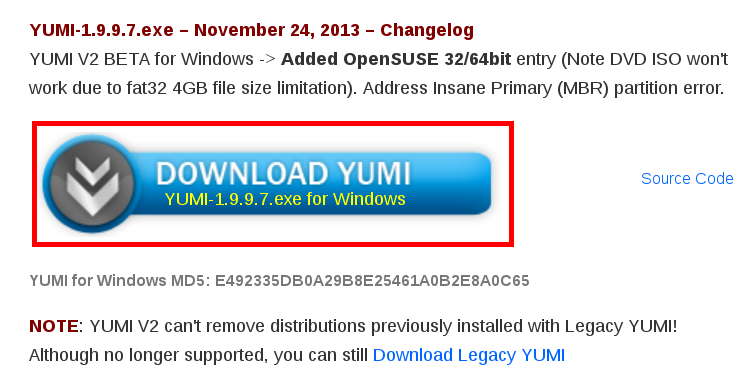
Download YUMI
Visit pendrivelinux site
YUMI specific page
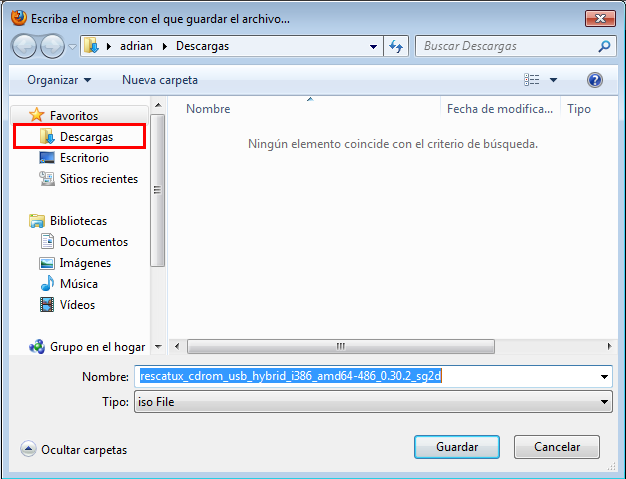
Download YUMI
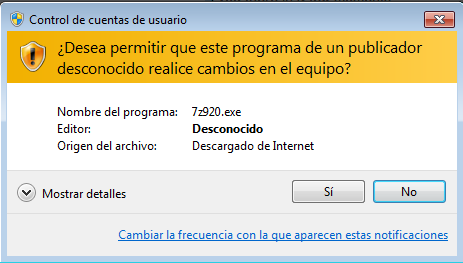
Run YUMI in Windows
Find YUMI
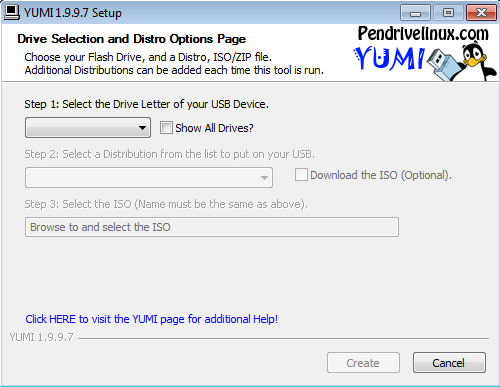
Run YUMI
Plug your USB Device into your computer
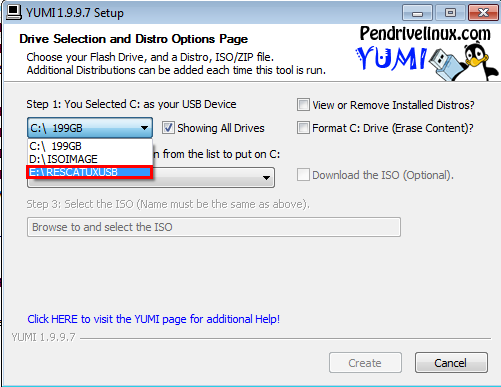
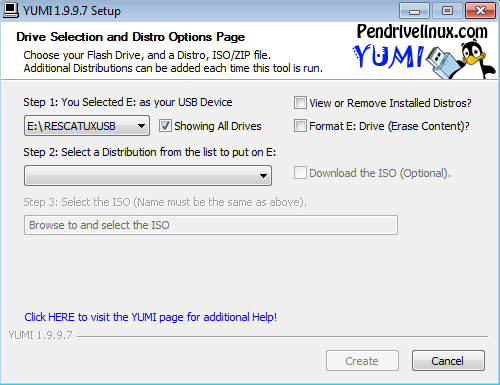
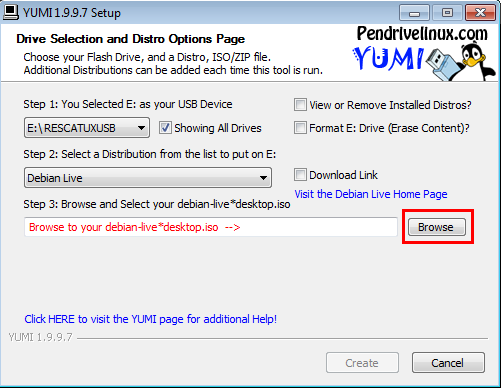
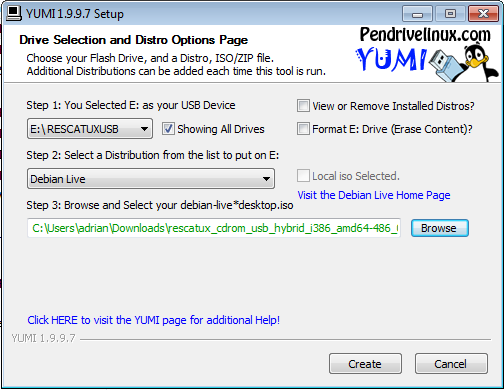
Select Drive letter of your USB Device
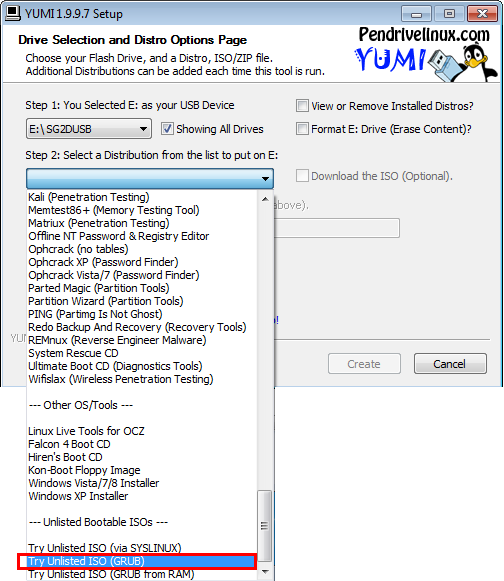
Select Try unlisted ISO (Grub) as Distribution
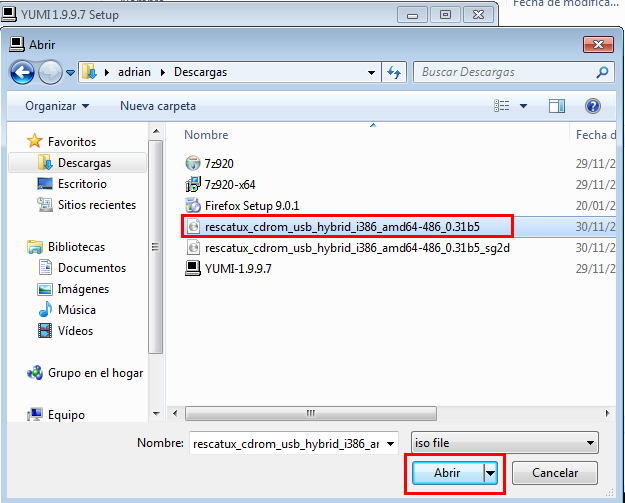
Browse and select Super Grub2 Disk ISO
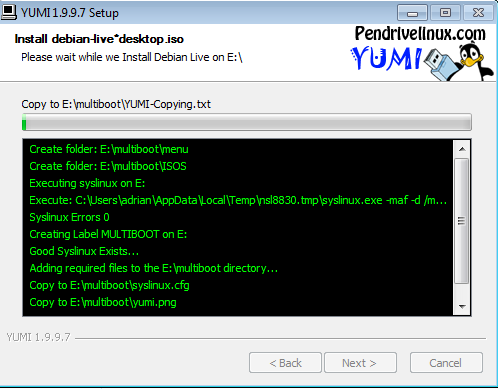
Create the Super Grub2 Disk USB

Put Super Grub2 Disk into an usb pendrive as an ISO image from Gnu/Linux
Put Super Grub2 Disk raw image into an usb
Put Super Grub2 Disk raw image into an usb and use it as an storage too
Put Super Grub2 Disk into a CDROM (or dvd)
No info on how to put Super Grub2 Disk into a CDROM (or dvd) yet. Sorry.
Muchas gracias
Please help me,i have got netbook pc,i am unable to find the bios option on it,i tried more keys again and again to find it but unable.it is novatium and its bios is shadowd.so i need the software to auto and install xp because it is installed ubunu and nova os already.the novatium care challage that i can not install other os in it.so now i need your help.therefore if you do not mind can you send a link to my email os installer for nova os.please…
To be able to boot SG2D from a Windows boot entry is not in the roadmap. It might be feasible when based on Grub2 2.02 but not sure.
Wer Linux hat, ist klar im Vorteil.
Zur Installation auf USB einfach eineSuperGrubDisk .iso herunterladen und mit double-disk als root auf USB (im Beispiel sdb) schreiben:
sudo dd if=/[Pfad zur heruntergeladenen .iso]/[ISO-Dateiname].iso of=/dev/sdb bs=1M
Super Grub Disk landet dann in sdb1.
Kleiner Tip: Wenn man zusätzlich auf dem USB in sdb2 ein linux-System installiert, bekommt man gleich noch ein laufendes System auf jedem Rechner, der mit SuperGrubDisk noch zu starten ist.
In einer sdb3-Partition können dann gleich noch Systembackups stehen, die auf das zerschossene System zurückgespielt werden können, scheißegal, ob linux, Windoofs oder das komische Zeug mit dem angefressenen Apfel.
Wie man die vorher dahinbekommt? Na, mit linux’ fsarchiver (aus unerfindlichen Gründen nicht in der Standardinstallation, aber in den Standardpaketquellen).
So z.B.:
sudo fsarchiver savefs -o -j2 -A -a -v -z3 /[backup-Pfad]/[backup-Dateiname].fsa /dev/sdb2 #sdb2 ist die Partition des zu sichernden Systems
Rückladen geht dann mit
sudo fsarchiver restfs -o -j2 -v /[backup-Pfad]/[backup-Dateiname].fsa id=0,dest=/dev/sdb2
Falls gleich noich formatiert werden soll, z.B. als ext2, geht das in einem Aufwasch gleich so:
sudo fsarchiver restfs -o -j2 -v /[backup-Pfad]/[backup-Dateiname].fsa id=0,dest=/dev/sdb2,mkfs=ext2
Tja, wie gesagt, wer linux hat, ist klar im Vorteil.
Getestet mit ubuntu und debian, kernel 2.6.32 bis 3.11.nochwas
Ce naiba scrie ăsta în Germană? IT-iștii lu’ pește care habar nu au engleză!
I hate the new Super Grub disk. It’s complicated,trying to navigate all the menus is time consuming and hard to install to usb key. I want the old Grub start disk but can’t find it anywhere.This is progress?
Can you please join the mailing list so that you can advise us how to improve the UI usability?
Thank you.
Old Super Grub Disk can be found under “Other stuff” and it’s not recommended for current systems.
neither of your grub fix programs work on yumi anymore
I need the versions you are testing.
Anyway if what you say it’s true the documentation will need to updated to recommend the ‘dd’ method by default.
Unfortunately I lack of time for doing it.
the dd method was described by Torsten (in German). He even described how to have other partitions on it. Use Google to translate it if you don’t have the time to find out on your own.
I need to find a method for windows. Another method for GNU/Linux. Find a physical machine where windows is installed (Not still sure how to emulate usb insertion and extraction in qemu/kvm). Do it step by step and collect the screenshots.
It’s not as easy as it seems. I prefer to center on the documentation side when Rescatux will get its next stable release.
Their are several ways to use an ISO (image) in most versions of OS, depending on the flavor, (Windows, Linux, etc.) and on how you want to operate it. (booting, or directly in the OS.)
If you need to “Burn” the ISO to make a boot disk, you can a few good programs, (for Windows= windows default to CD/DVD, or ISO2USB for a USB stick.) and Linux, Unetbootin, RUFUS, and the like.
For good measure, follow this link(‘s) and open each subsequent link in a “New TAB” for good measure; (Find a download like of your liking.)
https://help.ubuntu.com/search.html?cof=FORID%3A9&cx=003883529982892832976%3Ae2vwumte3fq&ie=UTF-8&q=ISO+to+USB&sa=Search
———————————————————
https://www.google.com/webhp?sourceid=chrome-instant&ion=1&espv=2&ie=UTF-8#q=how+to+burn+an+ISO+to+USB%3F
———————————————————
https://www.google.com/url?sa=t&rct=j&q=&esrc=s&source=web&cd=1&cad=rja&uact=8&ved=0ahUKEwjskMT82PzQAhXCOiYKHd3aDeUQFggaMAA&url=https%3A%2F%2Funetbootin.github.io%2F&usg=AFQjCNFqGhVBFgGSYr8D2fAO3ebDXdsUYQ&sig2=tT4Ppt6qJIdpKTqyw3SecQ&bvm=bv.142059868,d.eWE
———————————————————
I have not checked those links but thank you for your feedback.
I would like to add the SG2D to my usb flash drive which contains other live distros which I boot via syslinux. I have added the iso and start it in raw mode, however I would like to have the contents in a folder on the flash and boot it with syslinux, how to do it I would like to know. Thank you in advance.
Good question Ryan. The method you are describing is not supported because it won’t work in both BIOS and EFI systems.
However if you are still interested please join the mailing list. We are currently doing some tests with another final user which wants to do the same thing as you.
Could you please include Linux instructions? I’ve seen these “No info on ow to put Super Grub2 Disk ______________ yet. Sorry.” a couple times and nothing has changed.
Thanks in advance
I cannot yet. Use k3b for cdrom and dd for USB (be careful).
I had a message saying ‘syslinux failed’ your device won’t be bootable.
What’s the cause and how do I fix it?
Daniel: Please use carefully (it wipes the usb device or whatever you select to be used) a method that puts the image into a usb (usb imagewriter, dd, and such) instead of the Yumi method.
Thank you.
Mil gracias
“Wizard Step”?? what wizard? where does it come from?
all I find is the download and the link
“How to put Super Grub2 Disk into a CDROM or a USB”
obviously a initial step is required — getting the wizard, which is nowhere explained.
Hi confused,
You are not supposed to get into this page from Google. This is an ‘include’ page which it’s used from various wizards / howtos.
The current ‘include’ plugin for wordpress which I’m using does not let me show where an included page has been used elsewhere on the site.
Please use the main page. Under Help, Howtos you will find what you are looking for.
Hi!
Please give link to https://www.supergrubdisk.org/wiki/SGD_Howto_make#How_to_make_a_Super_Grub_Disk_USB. on this page.
It contains useful information how to make super grub disk on USB in Linux.
I will think about it. I prefer proper documentations with nice screenshots as this one.
Thanks guys! Really helpful!
Hello, it’s not booting. I have only UEFI and i tried to create a usb stick with both the uefi yumi installer and the normal installer. With UEFI the yumi grub menu pops up, but i can select only reboot. How can i fix this?
Muy claro el tutorial, no conocía la aplicación YUMI. Es muy práctica.
Gracias !
Did not need yumi to put SGD on usb took me about 11 goes to format the usb right as i could not mount it had to figr that out then usin ext4 format i think it formatted and installed from terminal on a usb booted copy of mint bcos i stuffd up my boot sec doin somethin a bideo was tellin me then fixed it with this and now the command come from titus in ytube fix boot luky i had a usb that was baked up and did not mattr if got wipd. sudo dd if=grub of=/deb/sdc bs=1M somthinne3like that.
Yeah, it’s better to use dd than yumi nowadays. However I don’t have to update the documentation properly.
Busy on rescatux/rescapp.
Thank you for your feedback!